Echo or reverb can make an audio recording sound hollow or distant. If you have recorded audio in a room with poor acoustics, you might be experiencing an echo in your recordings. Removing echo from an audio recording can improve its quality and make it sound clearer.
Step 1: Import the Audio File
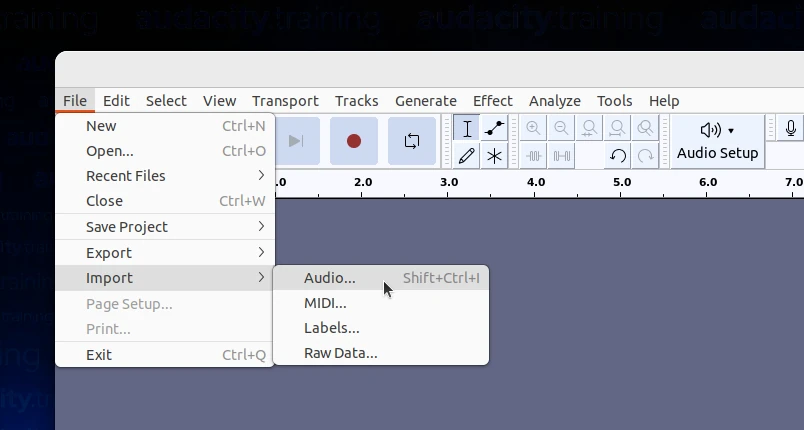
The first step is to import the audio file that contains the echo you want to remove into Audacity. To do this, open Audacity and click on "File" and then "Import" and select "Audio." In the file browser, select the file and click "Open."

The audio file will now appear in the Audacity interface.
Step 2: Identify the Echo
The next step is to identify the echo in the audio file. Zoom in to the waveform by using the zoom in tool in the toolbar or by pressing the "Ctrl" key and the "+" key on your keyboard simultaneously.

Listen to the audio and identify the section with the echo. Once you have identified the echo, select the section by clicking and dragging over it.
Step 3: Apply a High-Pass Filter
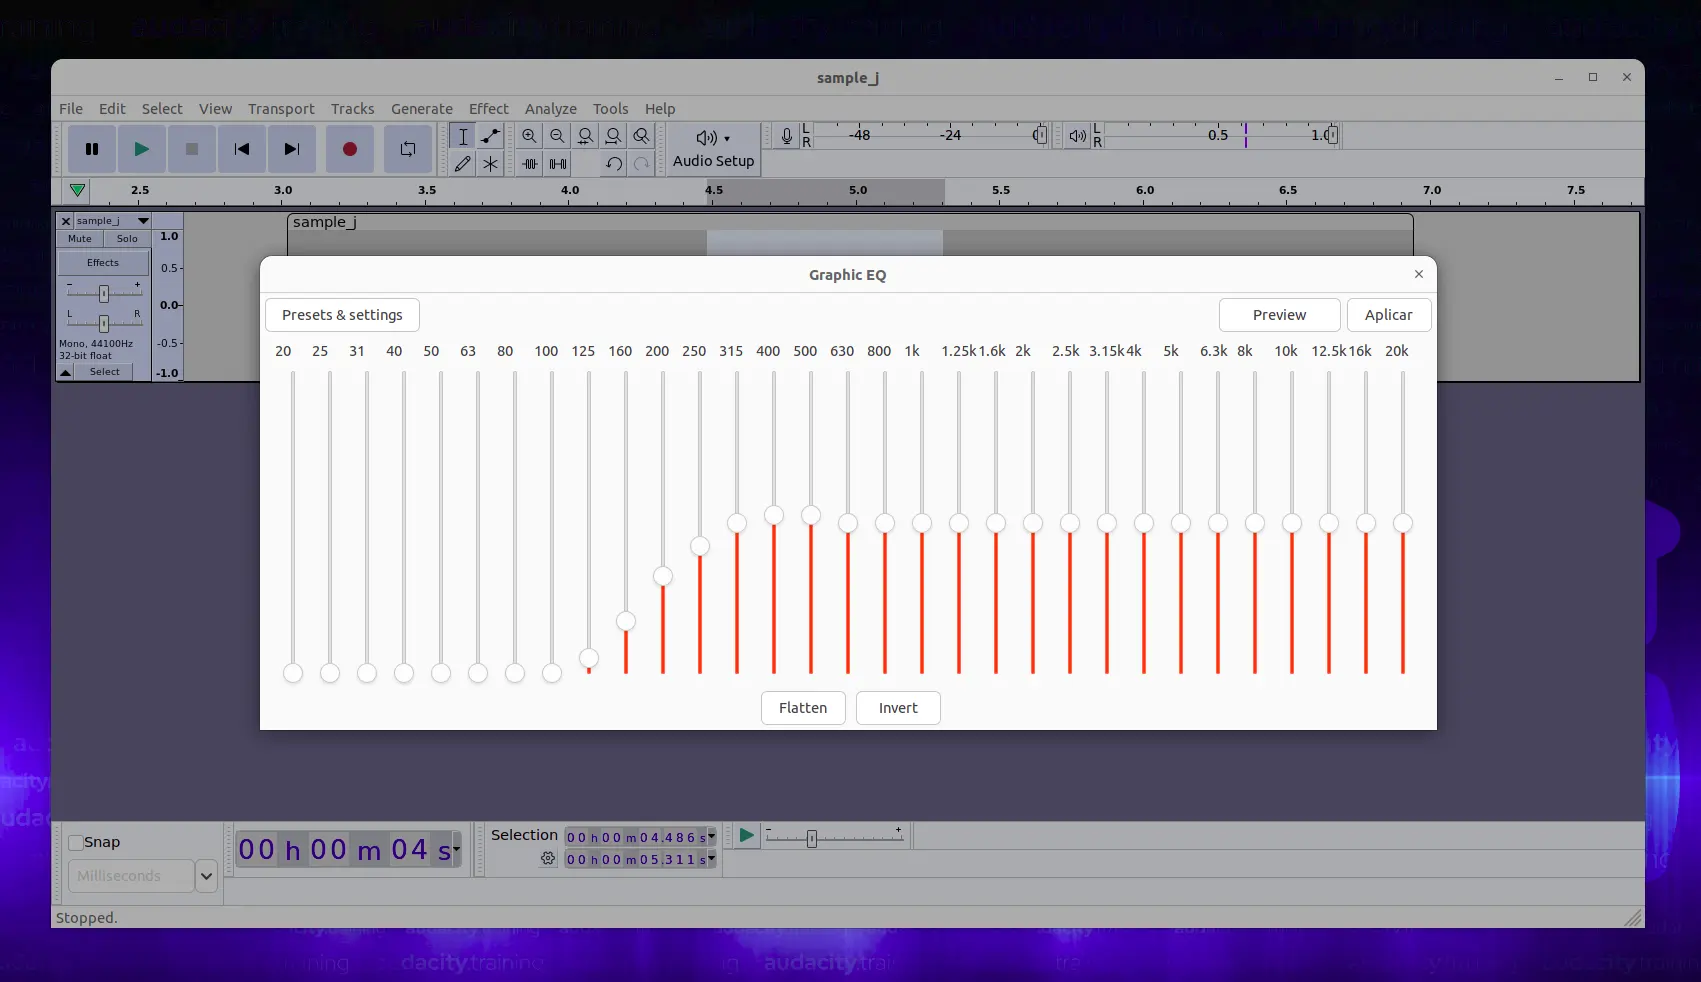
With the echo section selected, click on "Effect" in the top menu and then select "Graph EQ". In the dialog box, adjust the cutoff frequency to around 200 Hz.

You can preview the effect by clicking on the "Preview" button. Once you are satisfied with the result, click "OK" to apply the effect.
Step 4: Apply a Low-Pass Filter
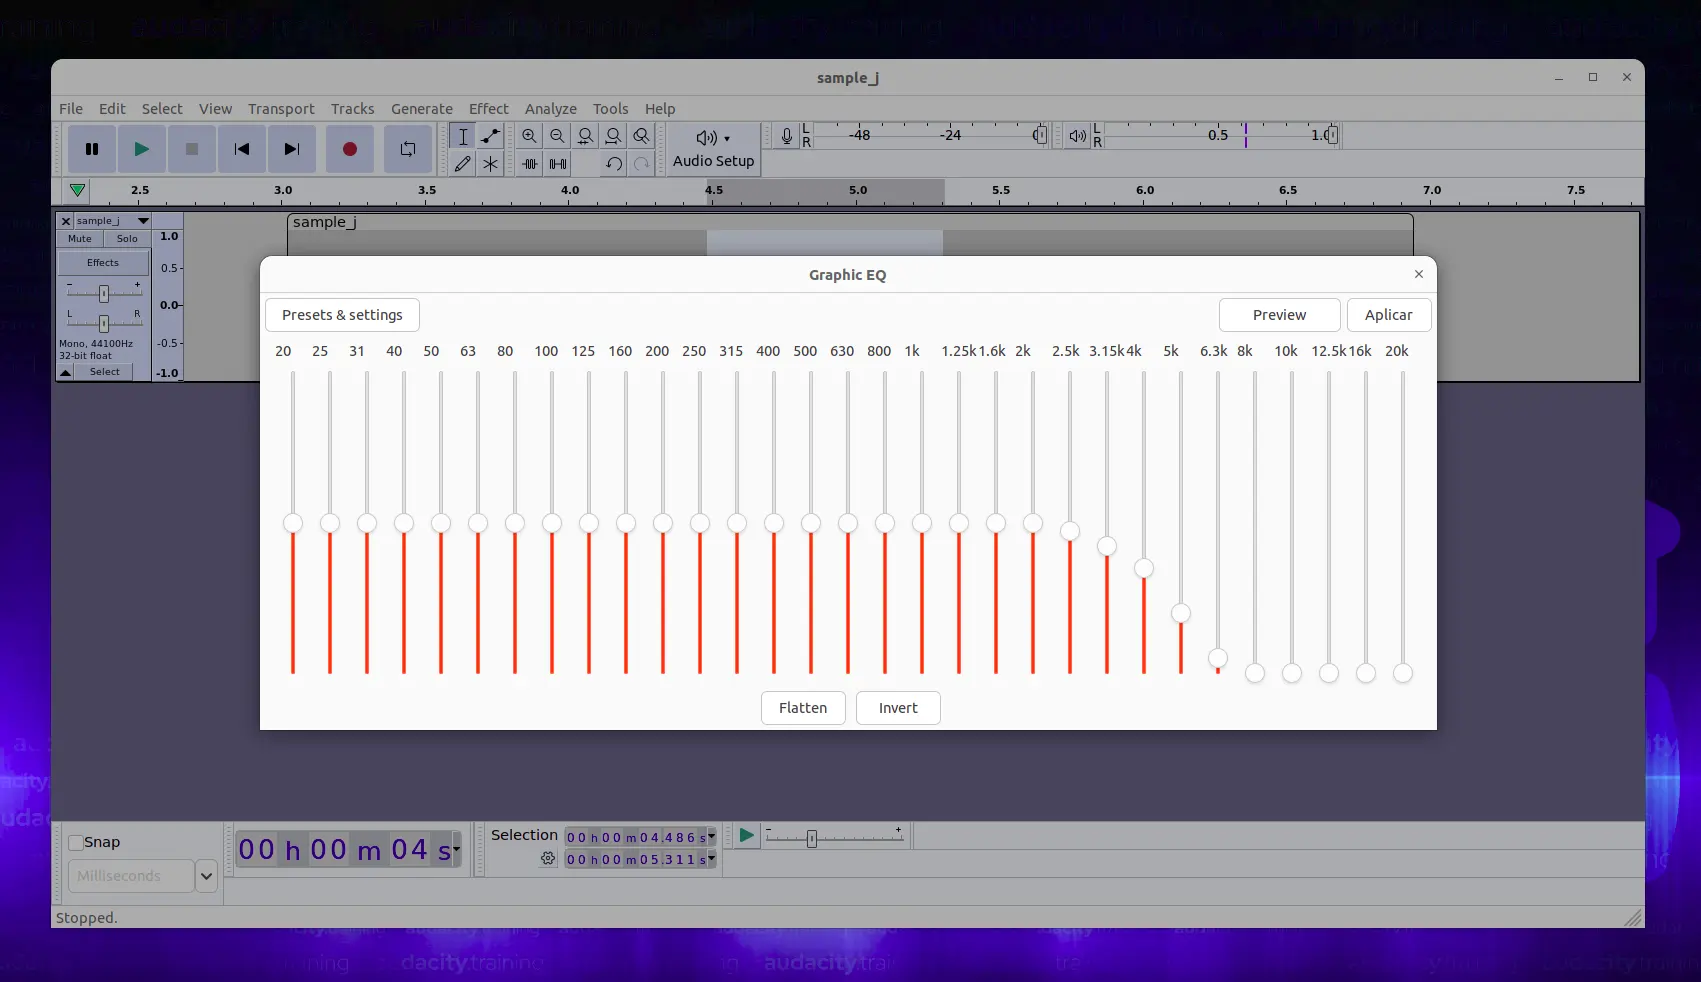
Next, click on "Effect" in the top menu and then select "Graph EQ." In the "Graph EQ" dialog box, adjust the cutoff frequency to around 2000 Hz. You can preview the effect by clicking on the "Preview" button.

Once you are satisfied with the result, click "OK" to apply the effect.
Step 5: Repeat if Needed
If the echo is still present after applying the filters, repeat the process by selecting the echo section again and applying the filters. You can also adjust the cutoff frequency to a higher or lower value to remove more or less echo. However, be careful not to overdo it, as this can make the audio sound unnatural.
Step 6: Export the Audio File
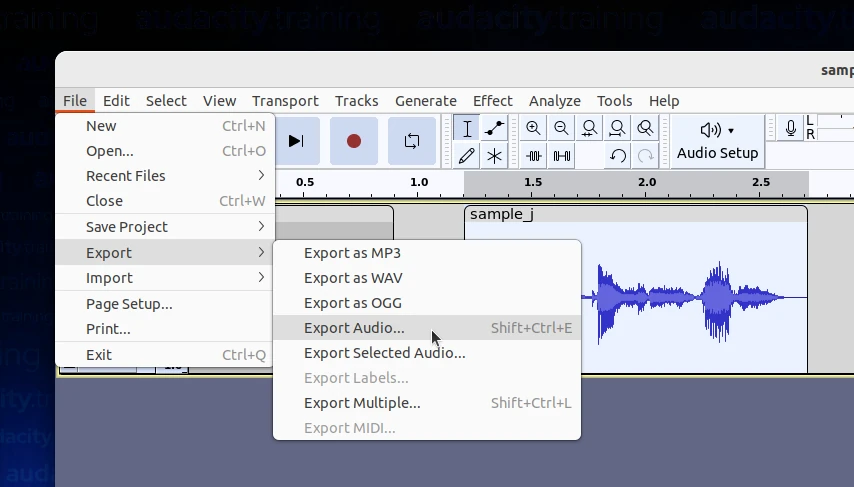
Once you have removed the echo, you can export the audio file by clicking on "File" and then "Export Audio." Choose a file name and location for the new file and select the file format you want to use.

We recommend using the MP3 format, as it is widely supported and has a small file size. Click "Save" to export the audio file without echo.
Step 7: Listen and Check the Result
Once you have exported the audio file, play it to make sure that the echo has been successfully removed. If there are any issues, you can go back and adjust the filters or repeat the process with a different section of the audio file.
In conclusion, removing echo from an audio recording in Audacity is a simple process that involves selecting the echo section, applying the High-Pass and Low-Pass filters, and exporting the audio file. With these steps, you can easily remove echo from your audio recordings and improve their quality.