Extending audio refers to the process of stretching out or elongating an audio clip. This can be useful for a variety of reasons, such as creating a longer musical composition or slowing down a speech recording for easier listening.
Step 1: Import the audio file
First, you need to import the audio file you want to extend into Audacity. To do this, simply click on "File" in the top left corner of the Audacity window and select "Import" from the dropdown menu.
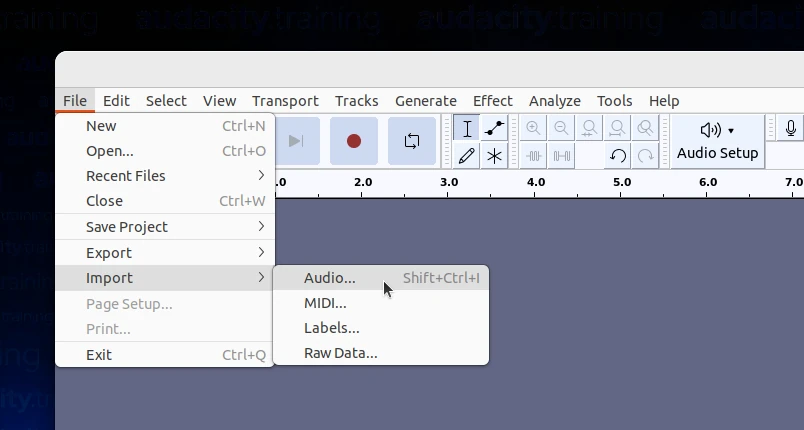
Then, choose the audio file you want to extend from your computer and click "Open". The audio file will now appear as a waveform in the Audacity window.
Step 2: Select the audio you want to extend
Next, you need to select the portion of the audio file you want to extend. To do this, click and drag your cursor over the waveform to highlight the section you want to extend.
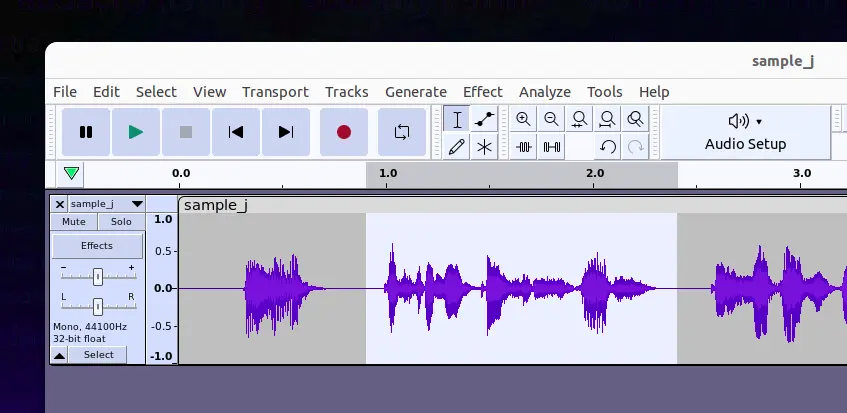
You can also use the playback controls at the top of the window to play back the audio and help you select the right section.
Step 3: Choose the time-stretching method
Once you've selected the audio you want to extend, you need to choose a time-stretching method. Audacity offers two different time-stretching algorithms: "Change Speed" and "Change Tempo".
The "Change Speed" method changes the playback speed of the audio while preserving the pitch. This means that if you slow down the audio, the pitch will lower, and if you speed it up, the pitch will increase.
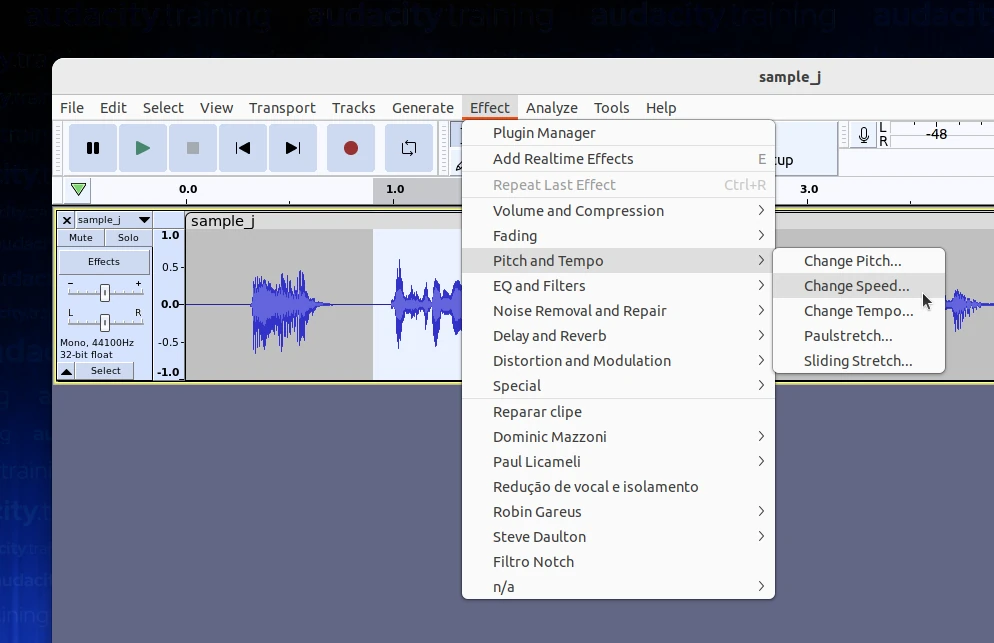
On the other hand, the "Change Tempo" method changes the tempo of the audio while preserving the pitch. This means that if you slow down the audio, the pitch will remain the same, but the rhythm will be slower, and if you speed it up, the rhythm will be faster, but the pitch will remain the same.
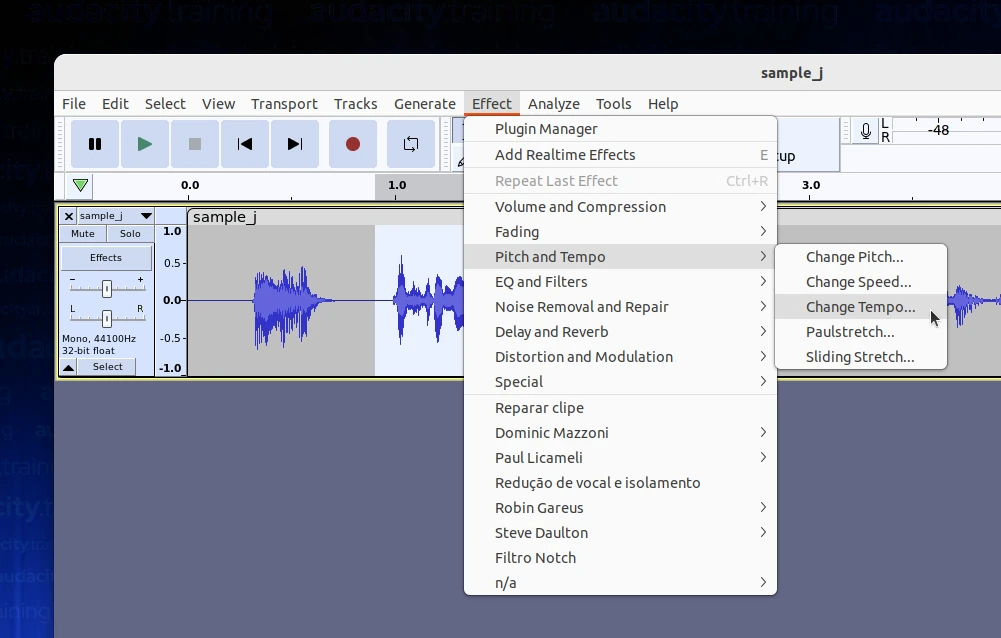
To choose a time-stretching method, click on "Effect" in the top menu bar and select "Change Speed" or "Change Tempo" from the dropdown menu.
Step 4: Adjust the time-stretching settings
Once you've selected your time-stretching method, a window will appear where you can adjust the time-stretching settings. The settings will vary depending on the method you chose.
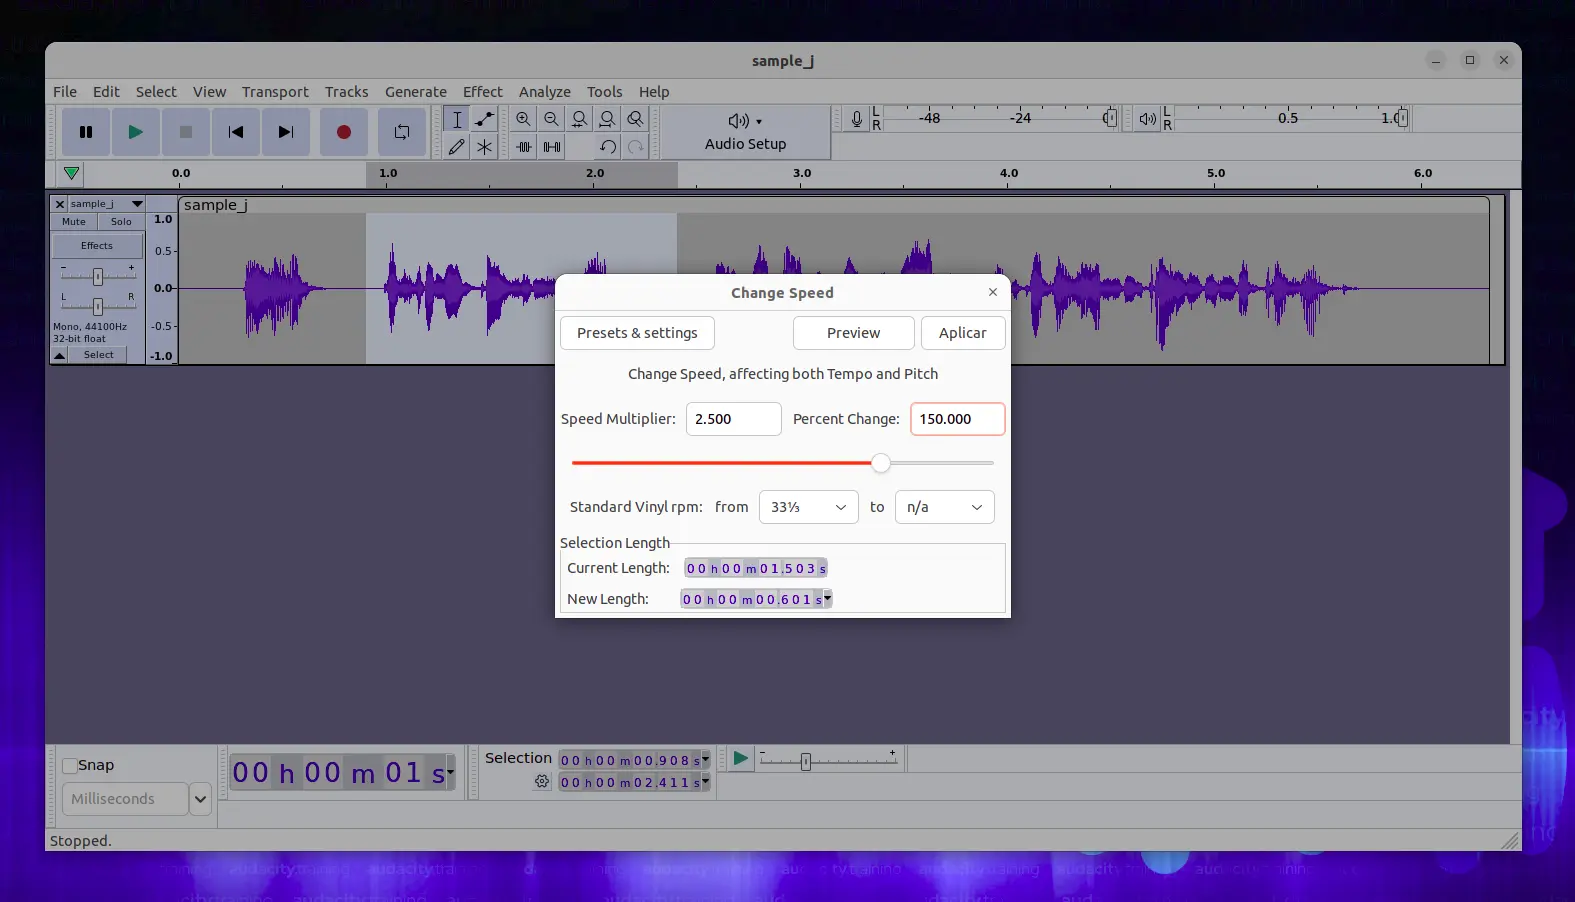
For the "Change Speed" method, you can adjust the "Percent Change" slider to change the playback speed of the audio. If you want to extend the audio, you should set the percent change to less than 100%. For example, if you want to extend the audio by 50%, you would set the percent change to 150%.
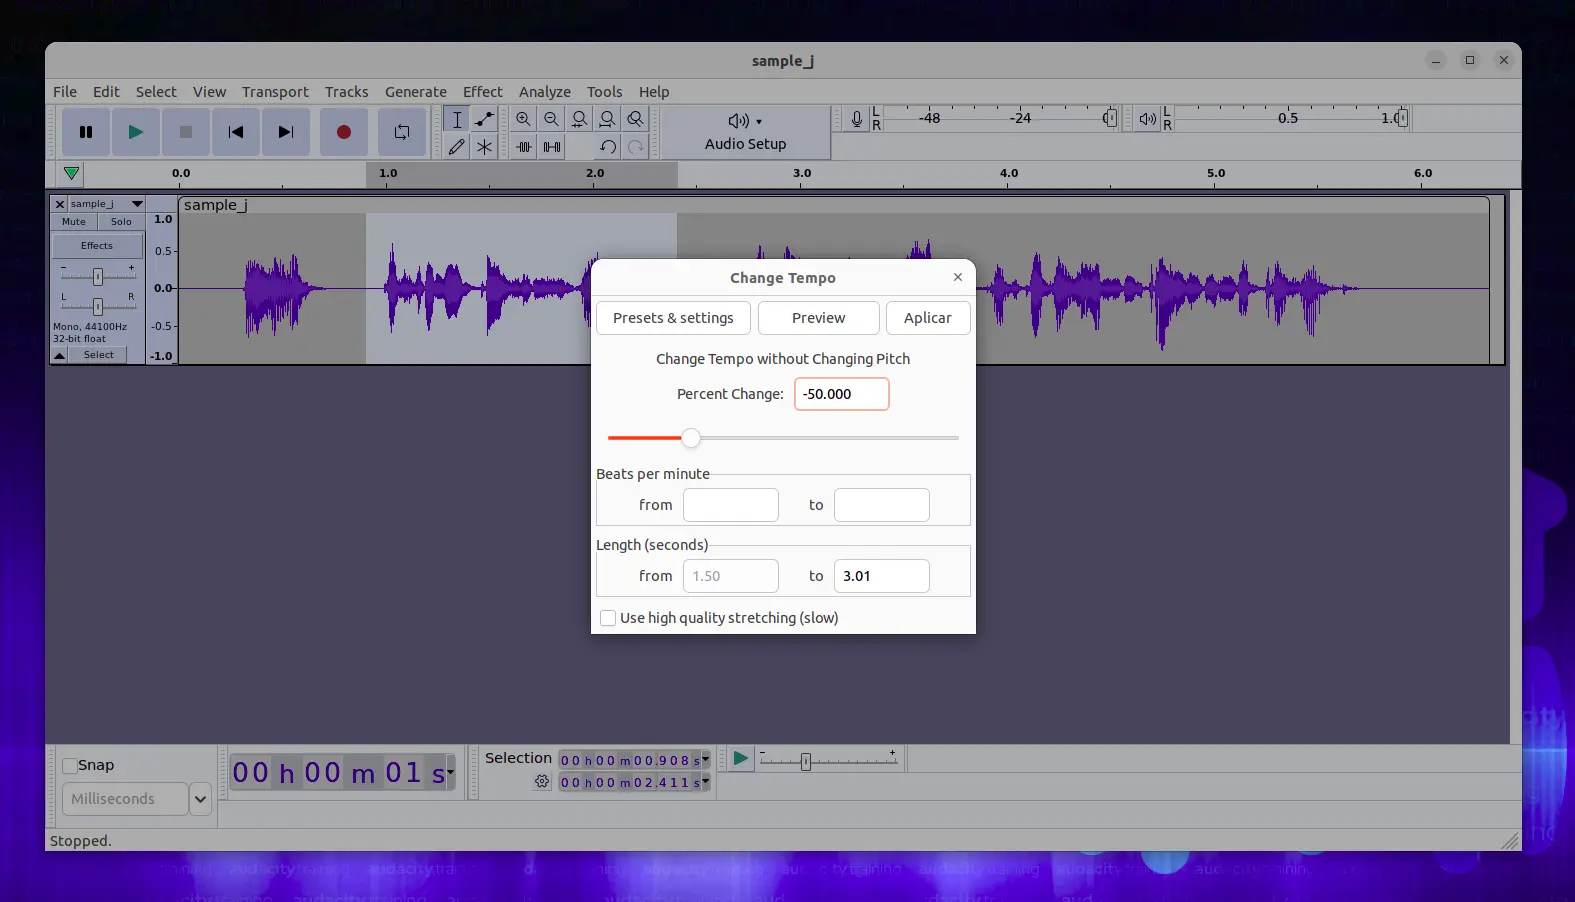
For the "Change Tempo" method, you can adjust the "Percent Change in Tempo" slider to change the tempo of the audio. Again, if you want to extend the audio, you should set the percent change to less than 100%. For example, if you want to extend the audio by 100%, you would set the percent change to -50%.
You can also adjust the "Time-Lapse Method" dropdown menu to choose between different time-stretching algorithms. The "Stretch" algorithm is the default and works well for most situations, but you can experiment with the other options to see if they produce better results.
Step 5: Preview the time-stretching
Before you apply the time-stretching effect, it's a good idea to preview it to see if it sounds how you want it to. To do this, click on the "Preview" button in the bottom left corner of the time-stretching window. This will play a preview of the time-stretched audio so you can hear how it will sound with the new settings.
If you're not happy with the preview, you can adjust the time-stretching settings and preview it again until you're satisfied.
Step 6: Apply the time-stretching effect
Once you're happy with the time-stretching settings, you can apply the effect to the audio. To do this, click on the "OK" button in the time-stretching window. Audacity will now apply the effect to the selected audio, extending it based on the settings you chose.
Step 7: Save the extended audio
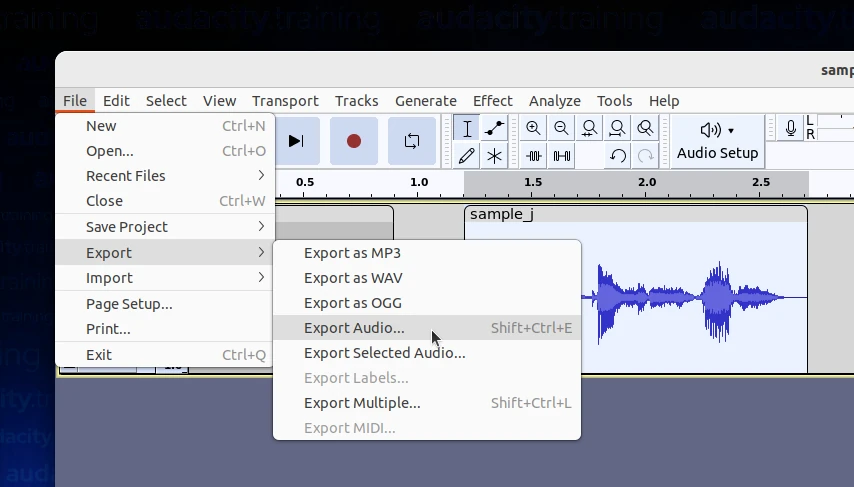
Finally, you need to save the extended audio file. To do this, click on "File" in the top left corner of the Audacity window and select "Export" from the dropdown menu. Choose a file name and location for the extended audio file, and select the file format you want to use (such as MP3 or WAV). Click "Save" to export the file.
And that's it! You've successfully extended audio in Audacity. If you need to extend other sections of the audio file, simply repeat the process starting from step 2.